
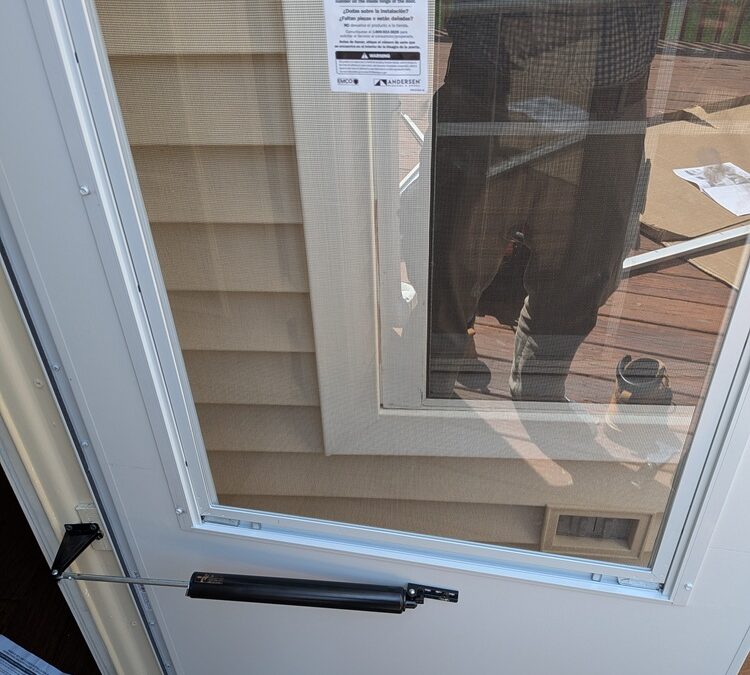
A well-fit storm door keeps weather and bugs out, lets breeze in, and protects your entry door. If yours is bent, won’t close, or the glass/screen has seen better days, a straightforward storm door replacement can make a big difference—especially throughout the all the seasons New Jersey goes through.
When replacing a storm door makes sense
- Bent or bowed aluminum frame; warped or dented door
- Glass/screen track damage, fogged or shattered inserts
- Closer or hinge screws won’t hold, stripped brickmold (exterior door trim), or rot behind hardware
- Latch won’t align even after adjustments
- You want a full-view screen option, better bug control, or improved curb appeal
1. Measure your door opening
Accurate measurements are the difference between a quick install and a day of fighting gaps and misaligned latches.
Width
- Measure brickmold-to-brickmold (exterior door trim) at top, middle, and bottom. Use the smallest measurement of the three.
Height
- Measure from sill (bottom) to the underside of the header/rain cap area on left, center, and right. Use the smallest of the three.
Handing and swing
- Confirm your primary door swing and choose a hinge side that clears handles, bells, and trim.
Threshold type
- Note if it’s sloped or flat; a sill expander may be needed for a tight seal.
Tip: Most 36×80 and 32×80 kits allow some adjustment—but out-of-square openings will need shims and careful placement for a replacement install.
2. Remove the old door without wrecking your trim
- Support the slab. Remove closer(s) and wind chain first.
- Back out hinge-side rail screws; slice old caulk with a sharp knife before prying (otherwise, you may unintentionally peel off paint!).
- Remove rain cap and latch-side Z-bar; clean off old sealant.
- Probe for soft spots or rot in brickmold/jamb and repair before installing the new door.
3. Dry-fit and set the hinge-side (follow your door kit instructions, but these are some generalized steps)
- Dry-fit the door in the opening; check the reveal to avoid binding at the latch side.
- Plumb the hinge-side Z-bar. Shim behind hinge points if the opening is out of plumb.
- Drill pilots and set a few screws; re-check swing and margins, then set remaining fasteners.
- Run at least one long screw into the wall framing for hinge-side strength.
4. Cut and install the rain cap and latch-side
- Cut the rain cap to exact width; keep ends square for clean corners.
- Install the cap snug to the header—don’t block any weep paths.
- Fit the latch-side Z-bar with an even reveal (about 1/8 in). Pre-drill and fasten.
5. Handle set, strike alignment, and closers
- Install the handle/lockset per the template; avoid over-tightening that can bow the door skin.
- Adjust the strike so the latch catches without lifting or slamming the slab.
- Mount closer(s) level with the correct bracket offset; tune speed and latching force.
- Wind-prone exposure? Add a wind chain or upgrade to a heavy-duty dual-closer.
6. Weatherproofing and final adjustments
- Set the sill expander/sweep to just brush the threshold—no drag that will wear the sweep.
- Seal vertical Z-bars and the rain cap with a continuous exterior-grade bead.
- Do not seal bottom weeps—water needs an exit.
- Verify smooth operation with the primary door; confirm the lock works and the closer doesn’t slam.
Common mistakes that cause leaks and latch headaches
- Wrong handing or handle clearance conflicts with the primary door or a smart doorbell
- Skipping the rain cap or sealing over weep holes with caulk
- Over-driving screws that bow the frame and misalign the latch
- Not tying hinge screws into framing—door sags within weeks
- Ignoring an out-of-square opening instead of shimming
- Closer mounted backwards or in the wrong bracket hole
Need More Help?
If you’re located in Somerset County, Help Me Henry can measure, install, and fine-tune your new storm door so it closes quietly and seals tight. Reach out to Help Me Henry for calm, tidy work and clear communication—start with a quick note and we’ll take it from there.
Related help and resources
- Our Services
- Why Your Exterior Door Isn’t Closing Properly (And What to Check)
- Upgrading or Replacing Deadbolt Locks: What Homeowners Should Know
- Fix Window Problems: Common Causes and Solutions
- Tips for Recaulking a Bathtub/Shower